
In a distributed system world it’s important to be flexible in message handling and make sure that your messages don’t disappear.
Advantages
There are a few advantages of using Dead Letter Exchange.
- Error message separation: messages with processing errors are separated from the main queue
- Time for a fix: we could easily deal with a buggy message when the time comes for it, which is important especially when working in the agile methodology
- A new way of message processing: next to ACK/NACK. Nacking error messages could overload all consumers (they all process and nack the same messages in an endless loop in a queue), which finally blocks message consuming
- More secure approach: in the “no message can disappear” scenario, when dealing with unprocessable messages, we can move them to the side track
- TTL per message: moves to DLX message when processing time reaches the limit
RabbitMQ and DLX principles
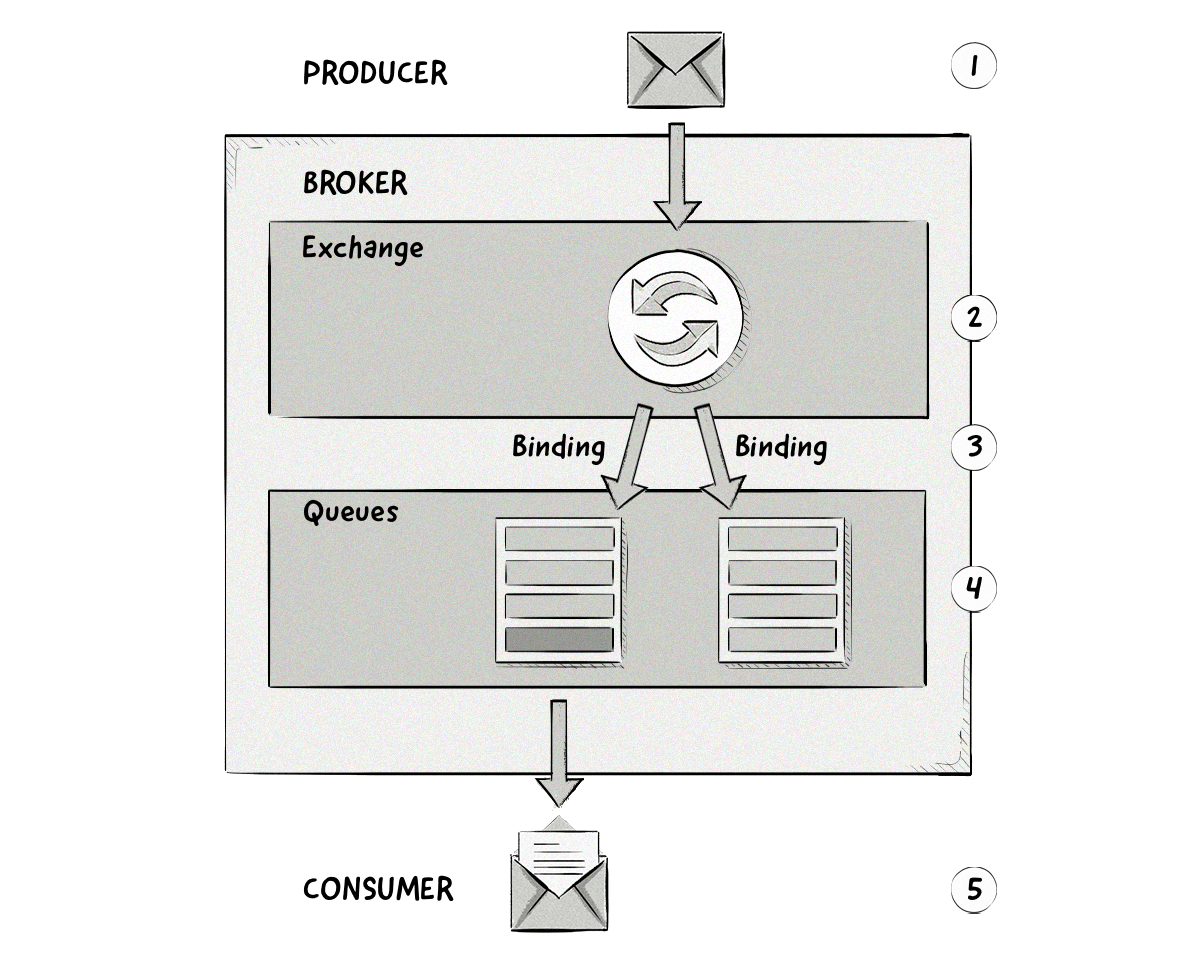
What is Dead Letter Exchange? Let’s start from the beginning. A message broker like RabbitMQ has two main entities: exchanges and queues.
- Exchange is an endpoint where messages are sent (produced).
- Exchange binds to one or more queues.
- A queue is a place where messages wait for processing (consuming).
Dead Letter Exchange simply is an exchange where messages processed by the consumer side with “processing problems” are redirected. Alongside DLX, we should also specify a queue for problematic messages.

In more technical terms, when a message goes to the DLX:
- The message is negatively acknowledged by a consumer using basic.reject or basic.nack with requeue parameter set to false,
- The message expires due to per-message TTL,
- The message is dropped because its queue has exceeded the length limit.
DLX setup in Node.js
Code definition of dead letter exchange + independent DLX queue. To work properly, it needs the amqplib library.
const amqplib = require('amqplib');

(async() => {
  let rabbit = await amqplib.connect({
    hostname: 'rabbitmq',
    username: 'admin',
    password: 'admin',
    port: 5672,
  });

  let channel = await rabbit.createChannel();

  let exchange = 'test_exchange';
  let queue = 'test_queue';
  let dlxExchange = 'test_dlx_exchange';
  let dlxQueue = 'test_dlx_queue';
  let dlxRoutingKey = 'dead-letter-key';

  // Standard exchnage + queue setup
  await channel.assertExchange(exchange, 'direct');
  await channel.assertQueue(queue, {
    durable: true,
    deadLetterExchange: dlxExchange,
    deadLetterRoutingKey: dlxRoutingKey,
  });
  await channel.bindQueue(queue, exchange);

  // DLX exchange + DLX queue setup
  await channel.assertExchange(dlxExchange);
  await channel.assertQueue(dlxQueue, {durable: true});
  await channel.bindQueue(dlxQueue, dlxExchange, dlxRoutingKey);
})();
Result in the dashboard:

Tips and tricks
- Check out Shovel Plugin for the RabbitMQ management dashboard – one of its features allows to move messages from one queue to another (for example: from DLX to the right one)
- Publish messages with the option
{persistent: true}and create queue definition with option{duarble: true}. This ensures that the messages don’t disappear when RabbitMQ restarts (especially in the orchestrated environment)
Docs
RabbitMQ DLX docs – https://www.rabbitmq.com/dlx.html
About dead letter queue – https://en.wikipedia.org/wiki/Dead_letter_queue
Advanced usage of DLX – https://blog.forma-pro.com/rabbitmq-retries-on-node-js-1f82c6afc1a1